Hand-Weaving Introduction & Loom Basics
Start your hand-weaving journey with traditional Portuguese loom techniques. This foundational course covers threading, pattern creation, and produces your first complete woven textile.
What You'll Learn in Hand-Weaving Basics
Hand-weaving isn't as complicated as it looks. The basics come down to understanding a few core principles—how threads interlace, how looms hold tension, and how patterns emerge from simple, repetitive movements. You'll be surprised how quickly it clicks once you've got your hands on a loom and feel the rhythm of the work.
This introduction course is designed for adults who want to learn traditional weaving techniques without years of formal training. Whether you're looking for a meditative craft or a way to create beautiful textiles for your home, you'll develop practical skills you can use immediately. Most students complete their first small woven piece—a table runner or wall hanging—within the first few weeks.
Understanding Loom Fundamentals
Every weaving project starts with the same basic setup. Let's break down what happens on a loom and why each part matters.
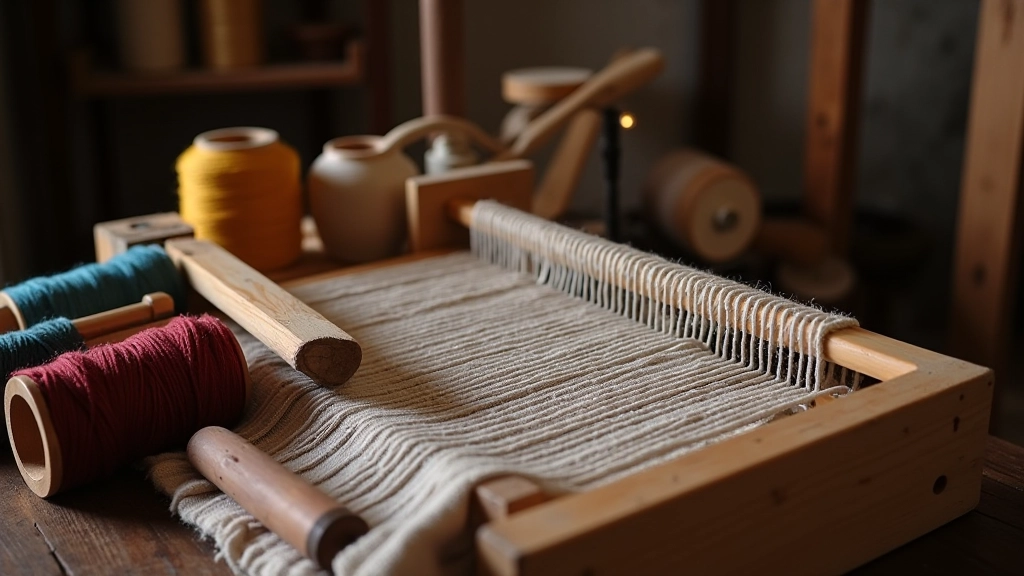
The Warp: Your Foundation
The warp is the lengthwise thread that you'll thread onto the loom first. It stays stationary and under tension throughout the weaving process. You'll typically space these threads about a quarter-inch apart, depending on your desired fabric density. The warp determines your piece's width and structural strength.
The Weft: Your Color & Pattern
The weft threads run horizontally across your warp, weaving over and under as you work. This is where your creativity comes in—you'll choose colors, textures, and rhythms. The weft gets pushed down tightly with each row you complete, building up your fabric. You can change weft colors mid-weave to create patterns and designs.
Tension & Structure
Getting tension right is probably the most important skill you'll develop. Too loose and your fabric falls apart. Too tight and you'll exhaust yourself. A good tension feels firm but not strained—think of a guitar string that's in tune. Most weavers find their rhythm within the first few practice sessions.
The Shed: Your Weaving Space
The shed is the gap created when warp threads separate—allowing you to pass your shuttle or needle through. On a traditional loom, you'll create the shed by moving a lever or pulling a handle. This rhythmic motion becomes meditative once you've done it a few dozen times.
Basic Weaving Techniques You'll Master
During the introduction course, you'll practice several fundamental weaving techniques. Don't worry if they seem strange at first—they're designed to be learned through repetition and muscle memory, not just understanding.
Plain Weave (The Foundation)
This is where everyone starts. Your weft thread goes over one warp thread, under the next, over the next, and so on. Then the next row alternates—under, over, under, over. Simple, repetitive, and hypnotic. Most beginners spend 3-4 sessions just practicing plain weave variations before moving to more complex patterns.
Threading the Loom
This is the setup phase that takes patience but becomes routine. You'll wind your warp thread through the loom's heddles and reed, spacing each thread evenly. A typical beginner project might have 40-80 warp threads. It takes about 30-45 minutes once you know the process, but it's the foundation for everything that comes after.
Creating Patterns with Color Changes
Once you've mastered plain weave, adding color creates visual interest instantly. You'll learn to switch your weft thread mid-row, creating stripes, geometric patterns, or gradients. Many weavers find this is where the craft becomes genuinely exciting—watching patterns emerge from color choices you're making in real time.
Your First Project: Step by Step
Here's what a typical beginner weaving project looks like from start to finish. Most students complete a small table runner (about 12 by 36 inches) in their first course.
Prepare Your Loom (Week 1)
You'll measure and wind your warp thread onto the loom's warp beam, then thread each individual strand through the heddles and reed. This takes about 45 minutes to an hour. Sounds tedious, but it's where you start understanding how the loom works mechanically.
Practice Plain Weave (Weeks 1-2)
You'll spend your first 2-3 sessions just practicing the basic over-under pattern. Your first 2-3 inches might look uneven or have tension issues. That's completely normal. By the end of week two, you'll notice your rhythm improving and your fabric becoming more consistent.
Add Color & Pattern (Weeks 2-3)
Once you're comfortable with the basic technique, you'll introduce color changes. You might weave 2 inches of one color, then switch to a contrasting thread and weave 3 inches of that. The visual result is immediate and rewarding.
Finishing & Removing (Week 4)
You'll learn to bind off your weft, remove your finished textile from the loom, and trim the warp ends. A simple fringe finish or hem completes your piece. Many students keep their first project as a reminder of where they started.
Essential Equipment for Hand-Weaving
You don't need an expensive setup to start weaving. The course provides access to all looms and most basic supplies. Here's what you'll be working with:
The Loom
You'll work with a traditional frame loom or floor loom, depending on the course level. Frame looms are perfect for beginners—they're portable, affordable, and simple to set up. Most looms used in our courses range from 12 to 30 inches wide.
Yarn & Thread
We provide various weights of yarn—cotton, wool, and linen blends. You'll discover preferences as you work. Some prefer smooth cotton for detailed work, others love the texture of wool. Most projects use 2-4 different yarn weights.
Shuttle or Needle
A shuttle carries your weft thread across the warp. Some are simple wooden bars, others are sophisticated devices. For small frame looms, you might use a large blunt needle instead. Either way, the principle is the same—they make threading easier and faster.
Reed & Heddles
These control your warp spacing and the shed. The reed's teeth hold threads evenly apart. Heddles—thin wires or strings—help separate warp threads for the weaving motion. Don't worry about understanding these fully yet; they become intuitive quickly.
Getting Started: Tips for New Weavers
These practical tips come from years of teaching beginners. You'll avoid common frustrations and develop good habits from the start.
Start Loose, Then Adjust
Your first instinct will be to tension everything tightly. Resist that. Start with slightly loose tension, then tighten gradually as you get a feel for it. You can always adjust, but over-tightened warp is hard on your hands and loom.
Keep a Weaving Journal
Note the yarn type, thread count, and tension you used. Keep a photo of finished pieces. This becomes invaluable when you're repeating a technique or troubleshooting problems later. It's also wonderful to look back on your progress.
Embrace Imperfection
Handmade textiles have irregularities. That's their beauty. Slight tension variations, color shifts, and uneven edges aren't mistakes—they're character. This realization usually hits by week two and makes the whole experience more enjoyable.
Find Your Rhythm
Weaving is meditative. You'll find a rhythm—the repetitive motion, the color choices, the slow emergence of fabric. Many weavers describe it as almost hypnotic. Let yourself sink into that rhythm rather than rushing to finish.
Ask Questions Often
No question is too basic. If your fabric looks uneven, ask. If you're unsure about tension, ask. If you're wondering whether a color choice works, ask. Instructors would rather answer the same question five times than have you struggle silently.
Connect with Fellow Weavers
You'll meet other people learning to weave. Friendships often form in these classes. You'll compare projects, share yarn finds, and celebrate progress together. The community aspect is something many students mention as their favorite part.
Practice Between Sessions
If you can, spend 15-20 minutes practicing between lessons. This builds muscle memory and rhythm. Even a short session helps your hands remember the motion better than spacing practice weeks apart.
Beginning Your Weaving Journey
Hand-weaving is one of those crafts that seems intimidating until you actually try it. Within your first session, you'll understand the basic mechanics. Within a month, you'll have a finished textile you created with your own hands. That's genuinely powerful.
What makes this introduction course special is that it's designed for adults who want to learn without pressure or judgment. Everyone's starting from the same place. Everyone's first project looks a bit rough. And everyone leaves with a genuine skill and something beautiful to show for their time.
"I wasn't sure I'd have the patience for something this detailed. But there's something really meditative about the rhythm. Now I weave for an hour and lose track of time completely."
— Paula, 52
The introduction and loom basics course typically runs for four weeks, with sessions twice per week. You'll leave with fundamental skills, completed projects, and genuine confidence that you can create textiles. Many students continue into intermediate courses, developing more complex techniques and patterns. But even if weaving becomes just a hobby you enjoy occasionally, you'll have learned something valuable about yourself and discovered a craft that'll be there whenever you need it.
Ready to Start Weaving?
The next introduction course starts soon. All materials and looms are provided—you just need to show up with curiosity and an open mind.
Explore All Courses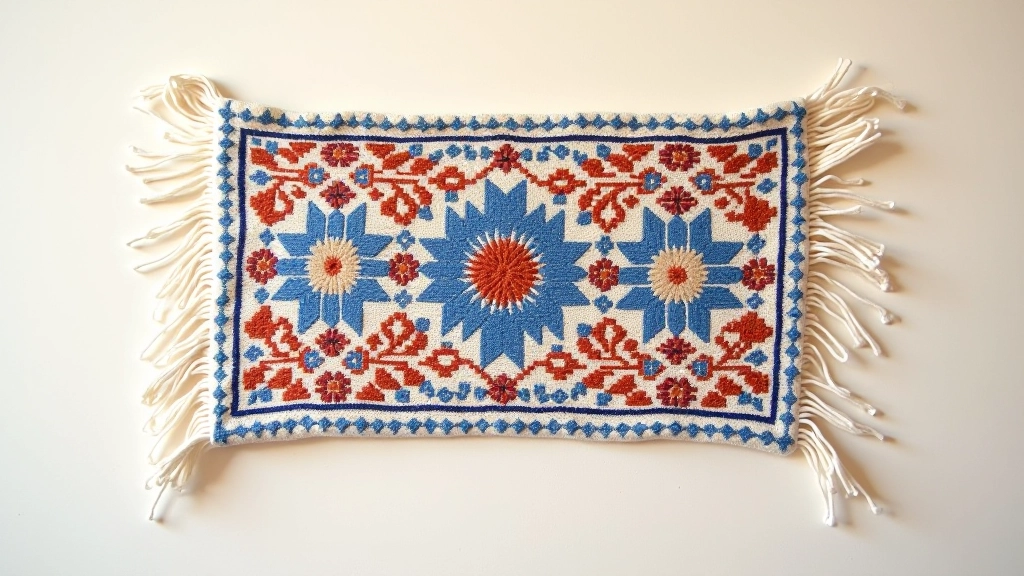
About This Guide
This guide provides educational information about hand-weaving fundamentals and traditional Portuguese weaving techniques. The content describes general processes and concepts to help you understand weaving as a craft. Individual results, learning pace, and project outcomes may vary based on your experience level, practice frequency, and personal circumstances. Always follow safety guidelines when using looms and tools. For specific instruction, guidance on technique refinement, or to address individual challenges, consult with experienced instructors during hands-on courses.
Explore Related Courses